Customised Screenshots
Pasting screenshots using standard Excel procedures works if you are dealing with a single view, non-scrolling, screenshot. Otherwise, the image is initially shown at full size but once saved inside a cell, it is minimised and difficult to expand when viewing.
We are progressively adding a customised screenshot view macro to some of our worksheets with limited screen space. This will allow you to insert an image into a cell and preview it in full-size, regardless of length.
Importantly, this customised screenshot macro will only run in cells that we identify as screenshot cells. Here are the procedures to use this macro –
- Take a screenshot;
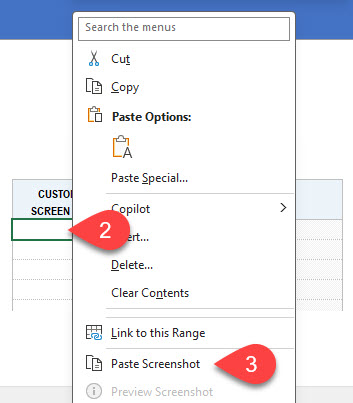
- Select the destination cell;
- Right-click and Paste Screenshot;
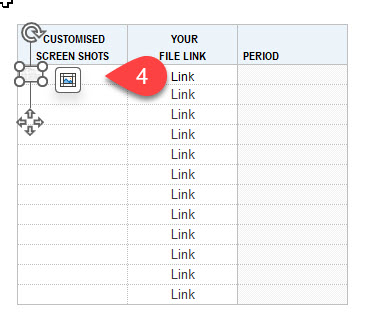
- A thumbnail will be inserted to that cell;
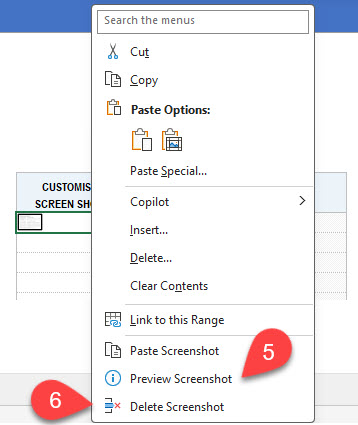
- To view the image either double click on the cell or right-click and Preview Screenshot;
- To delete a screenshot, right-click and choose Delete Screenshot; and
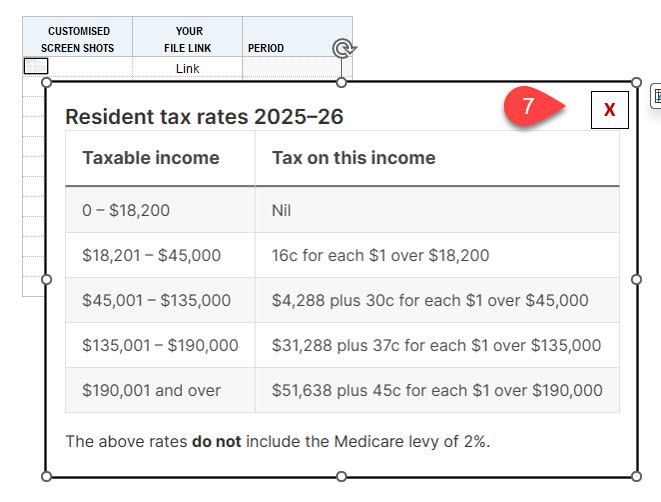
- To close a screenshot, click on the red cross in the top right hand corner of the image.